


Model: T5410-USRB
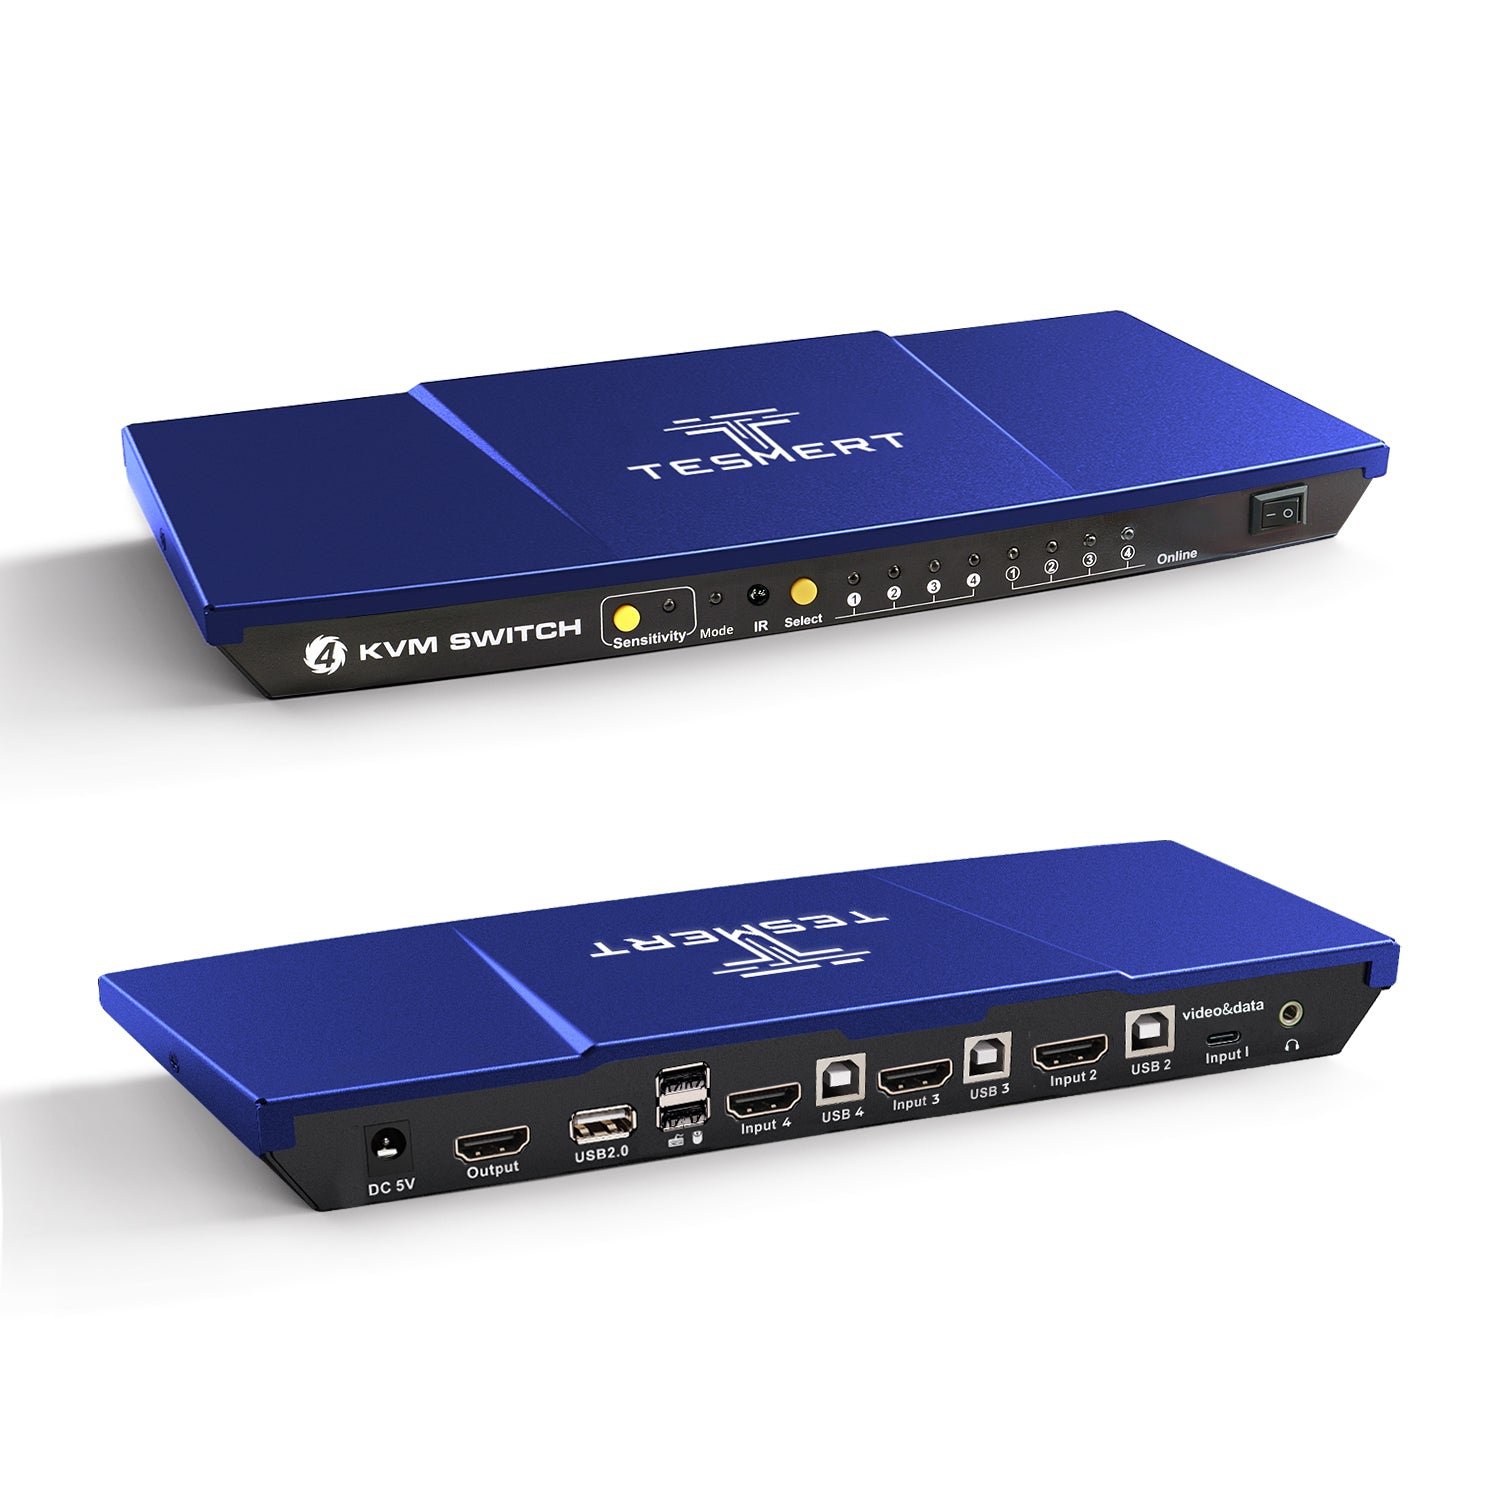
4×1 Hybrid KVM Switch T5410
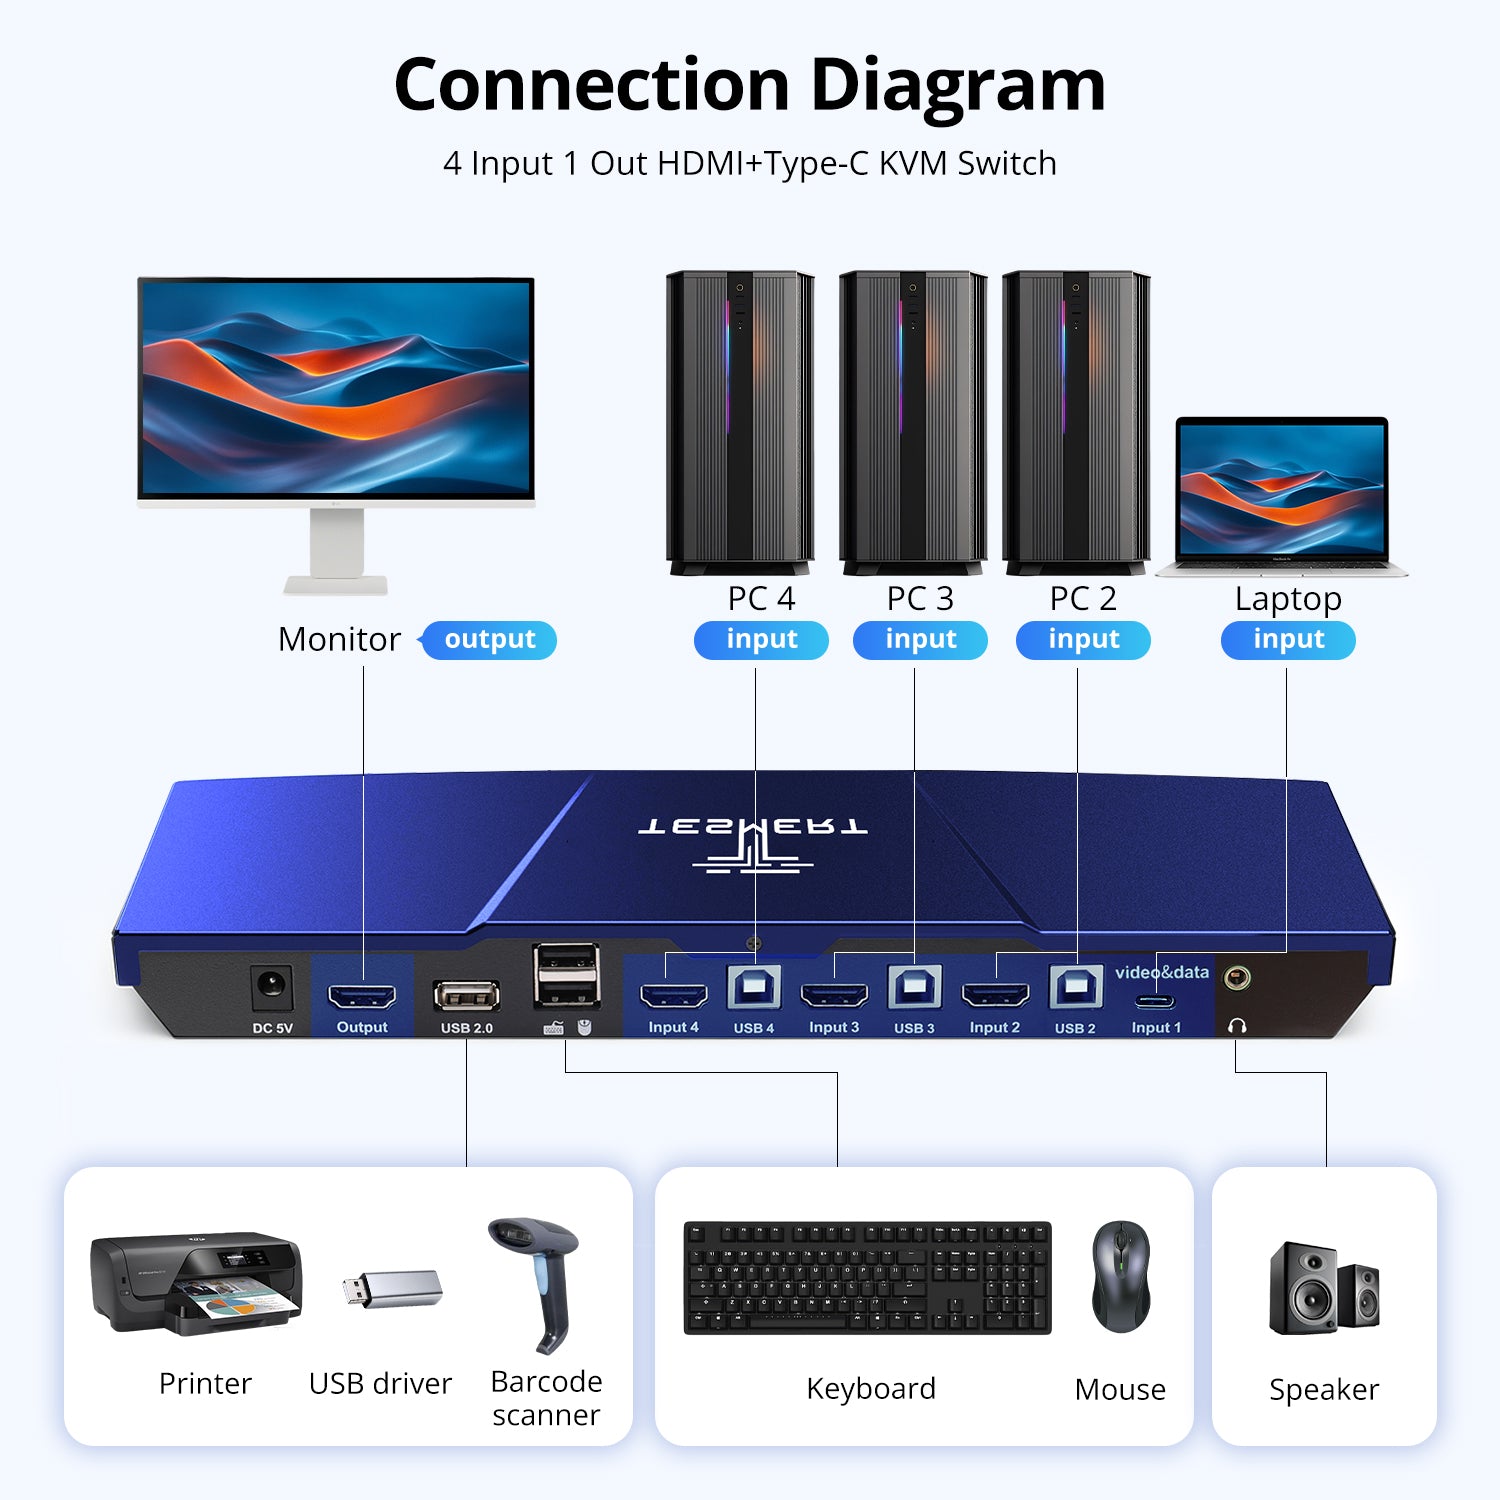
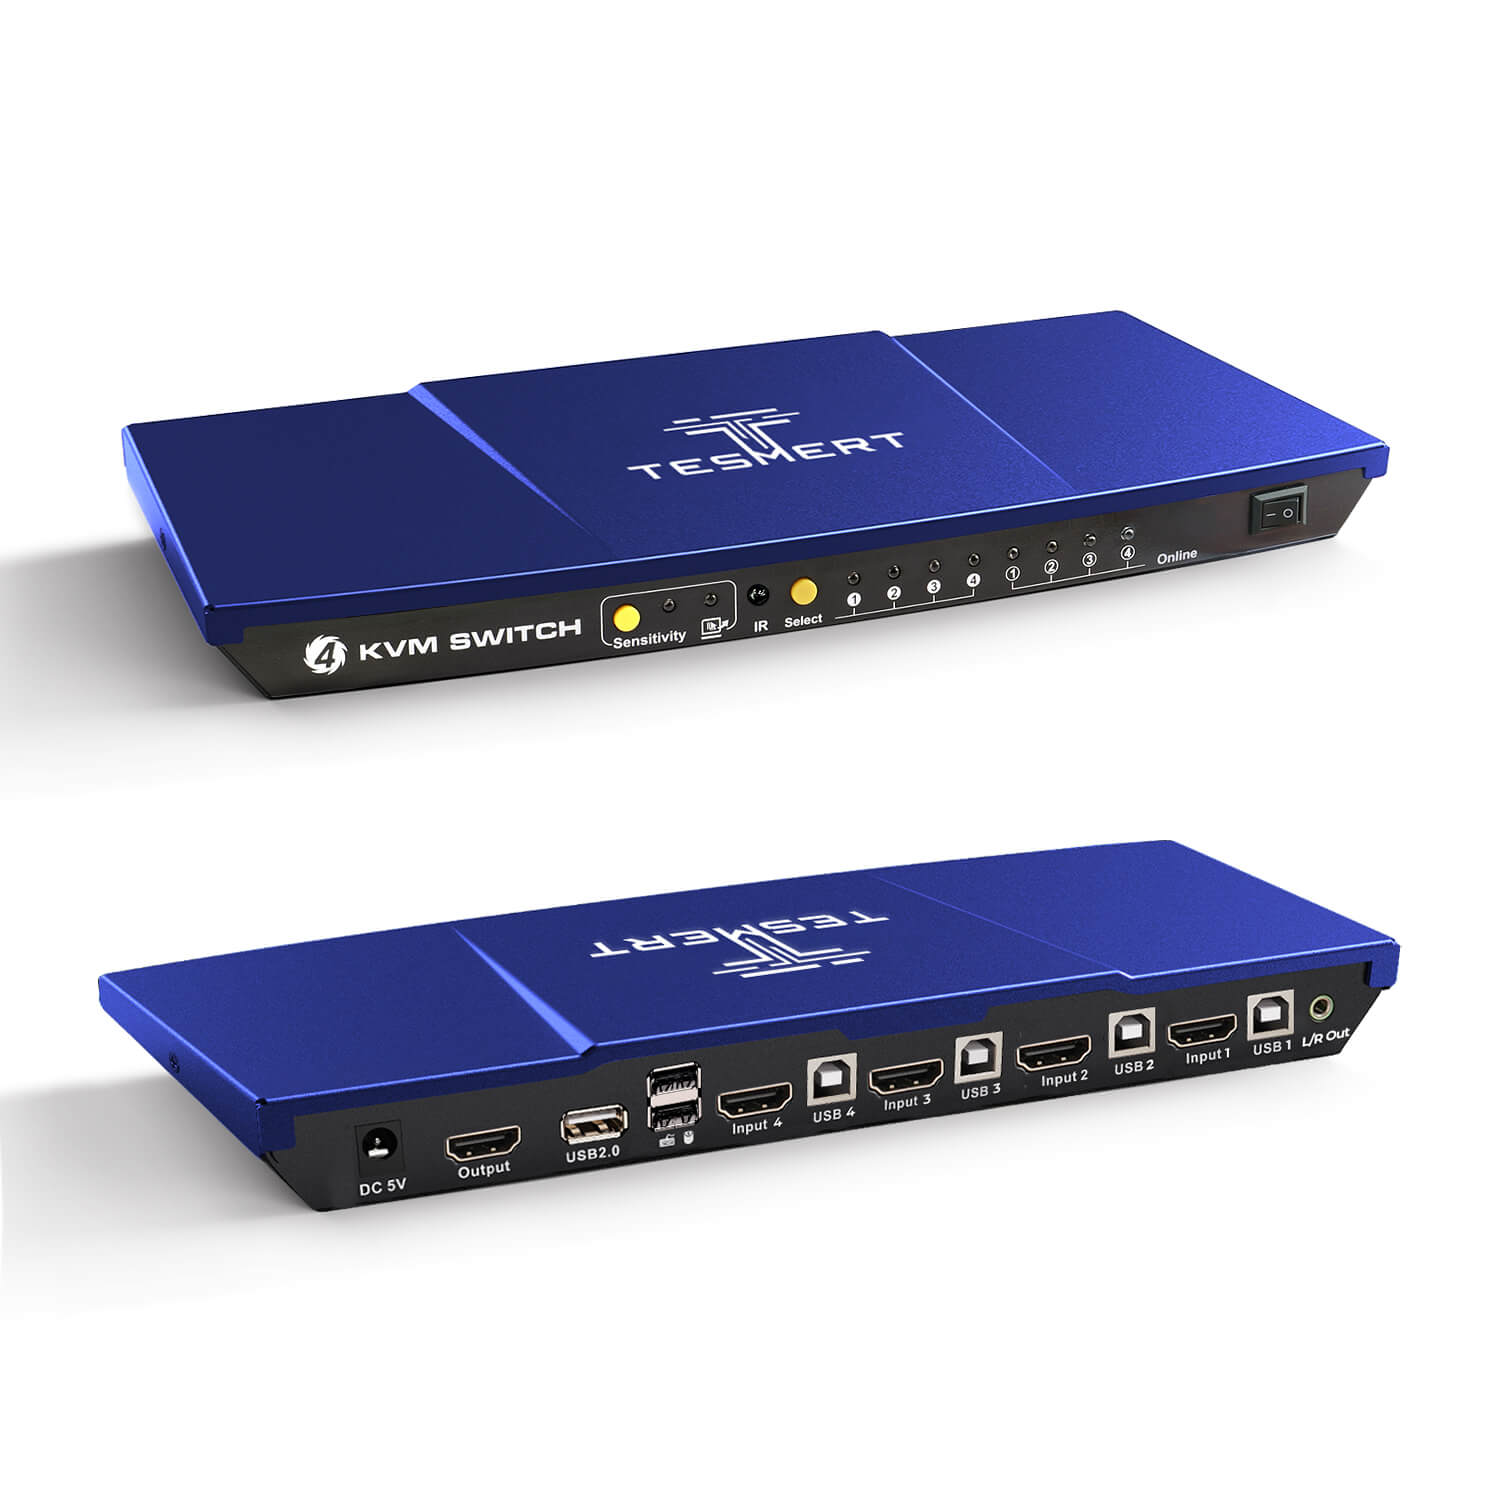
- Input: 3*(HDMI+USB) ports and USB-C port;
- Output: HDMI port;
- Keyboard & Mouse ports;
- USB 2.0 hub for peripherals such as barcode scanners and USB storage devices; analog L/R audio output
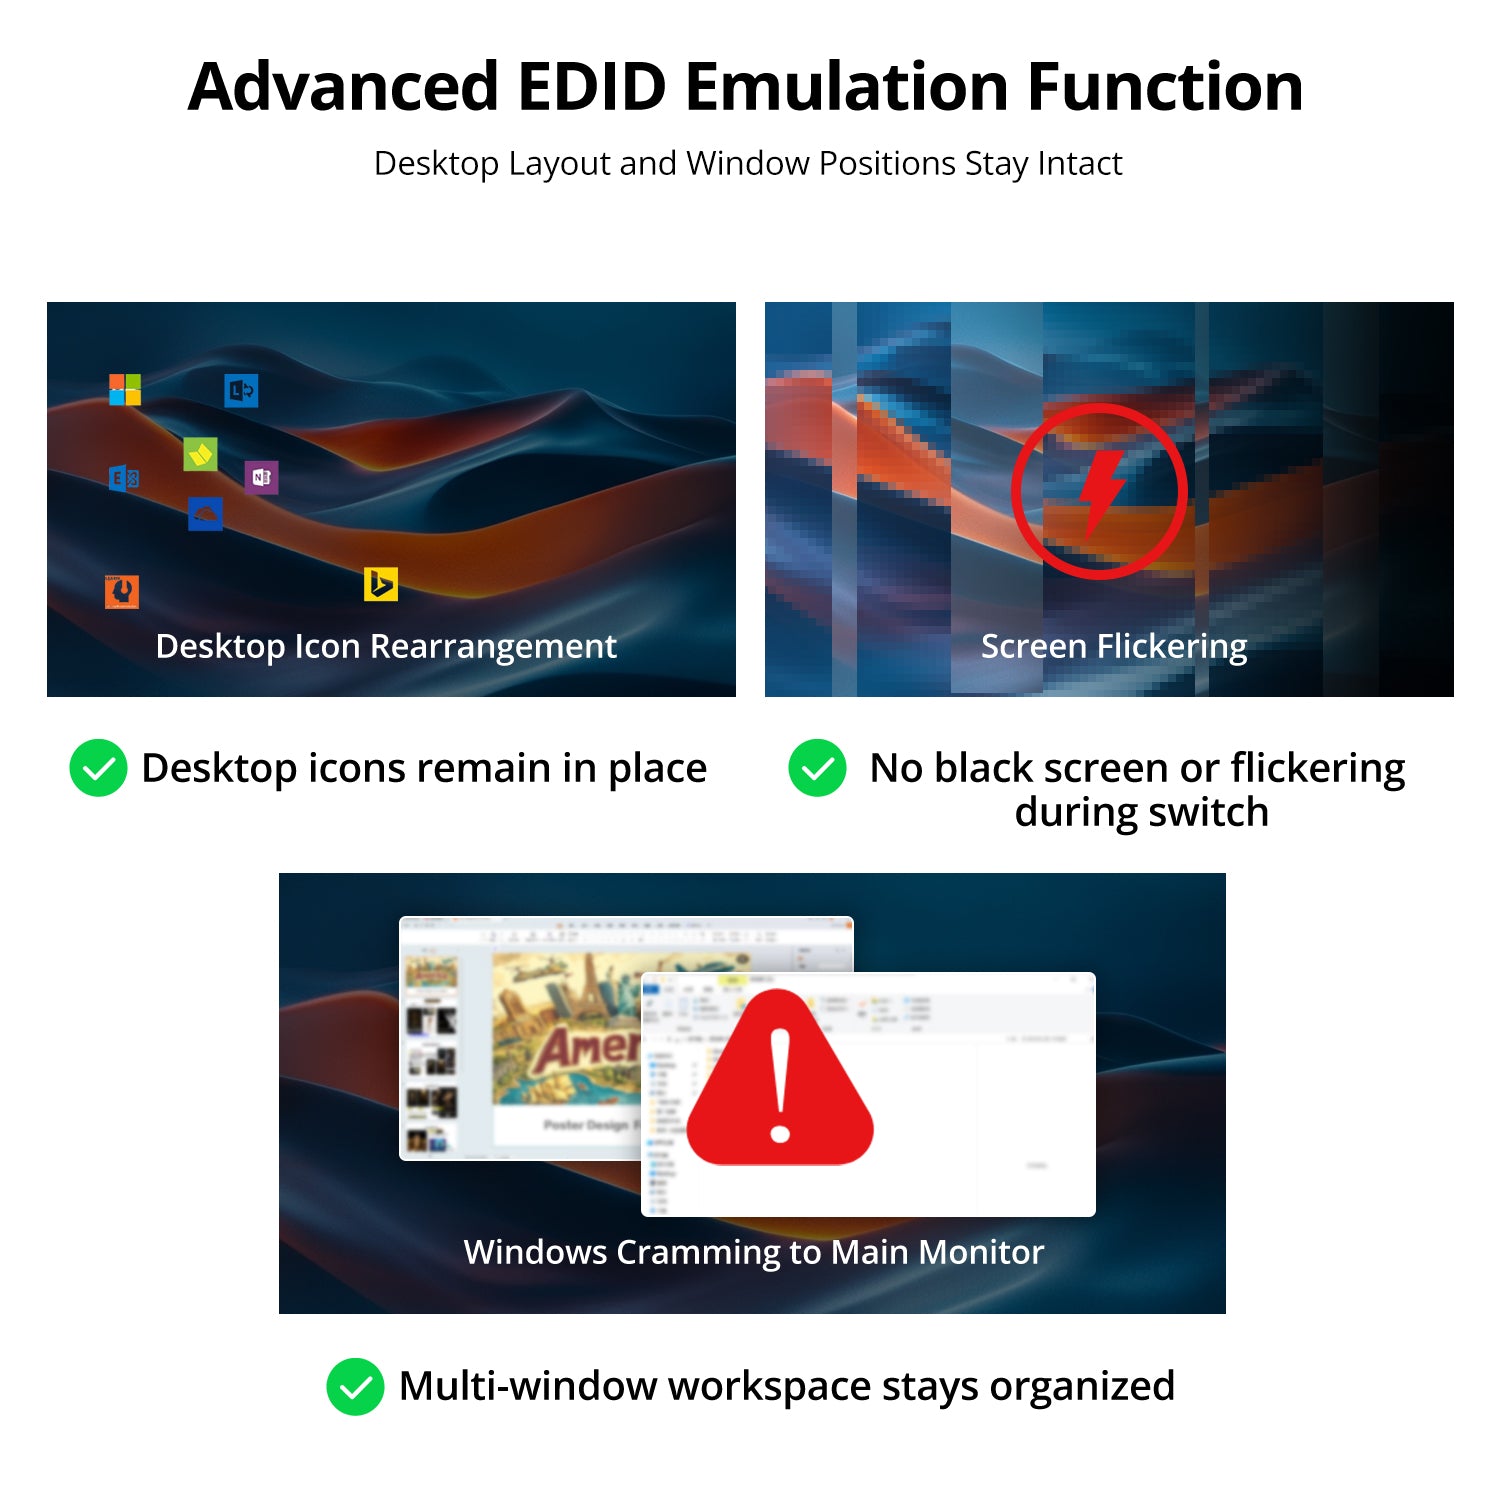
- EDlD emulation on each input to maintain stable display output;
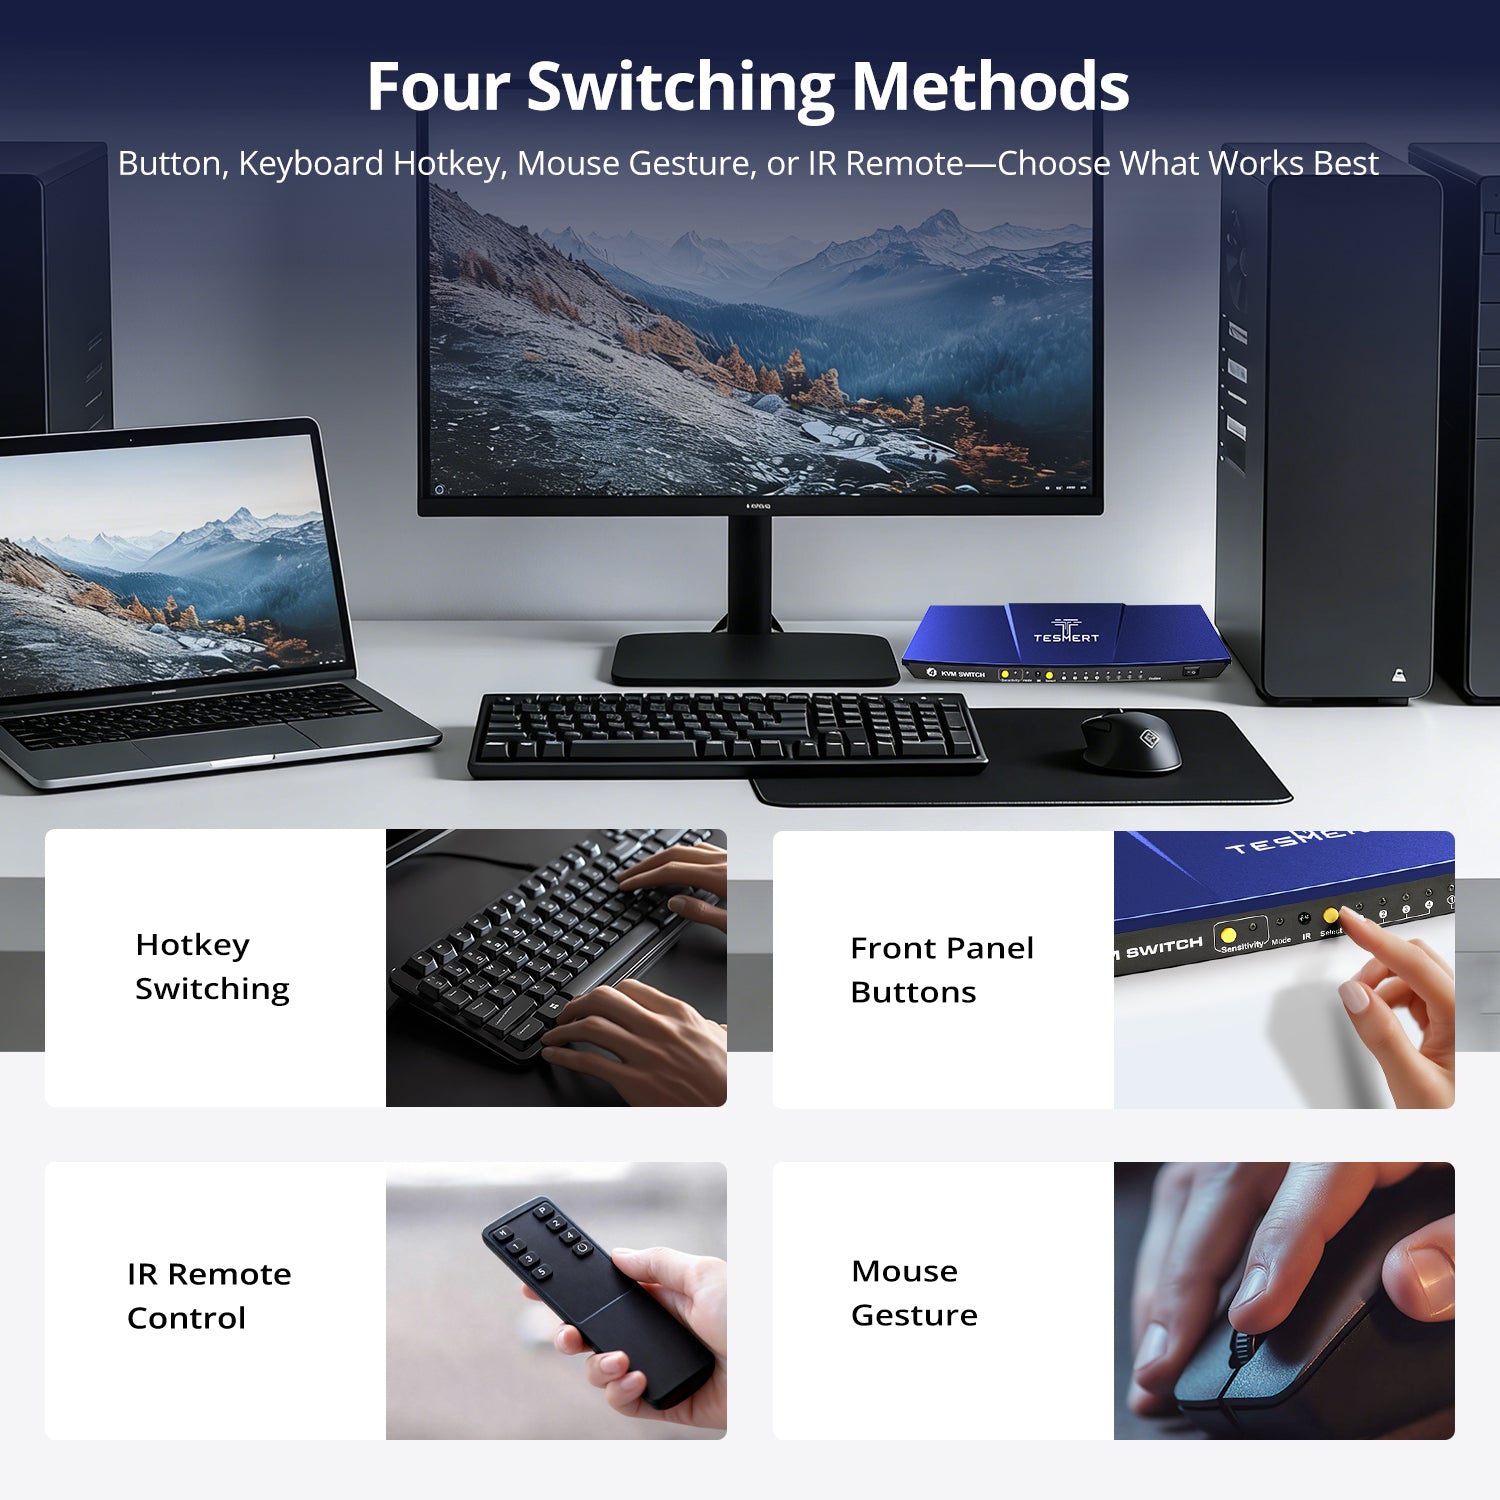
- supports switching via front panel buttons, lR remote, keyboard hotkeys, mouse gestures, auto-switching with adjustable intervals;
- hot-plug supported.
*Need a different power specification? Contact us for available options.
Pairs well with
Free US Shipping! Ships within 5-7 business days.
30-Day Hassle-Free Returns & Purchase Guarantee
1-Year Warranty
Secure Payment
4×1 Hybrid KVM Switch T5410
If you have any questions, you are always welcome to contact us. We'll get back to you as soon as possible, within 24 hours on weekdays.
-
Free US Shipping · Fast Delivery
Delivery typically arrives in 5–7 business days.
Details are available in our Shipping Policy. -
30-Day Returns · Quality Guaranteed
Returns are accepted within 30 days for peace of mind.
See our Returns & Warranty Policy for details. -
Secure & Trusted Payments
All transactions are protected with industry-standard security.
-
Customer Support
Questions about your order? Feel free to Contact Us.
Overview
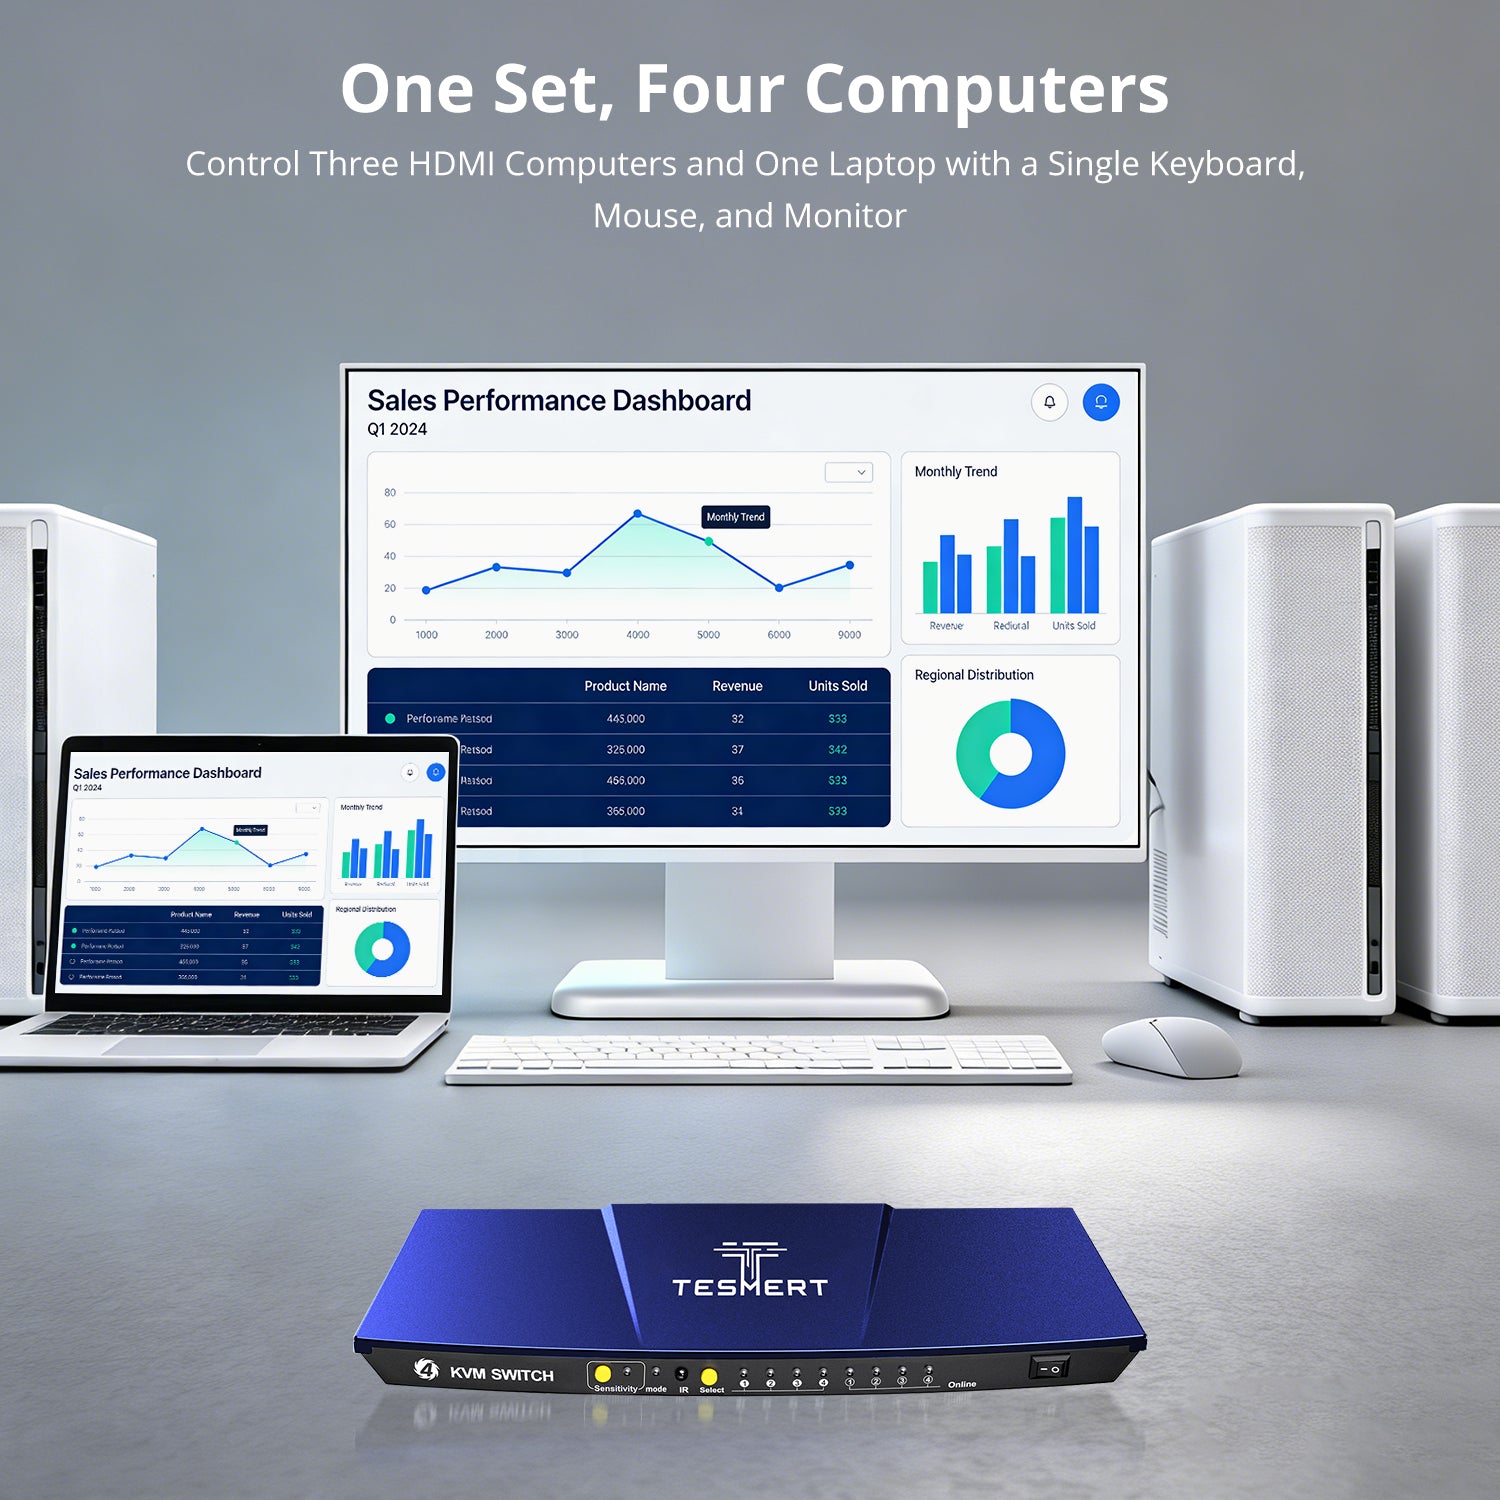
Designed for professional multi-computer environments, this 4-in-1 KVM switch supports one USB-C laptop and three HDMI computers sharing a single monitor, keyboard, and mouse. It delivers stable 4K@60Hz video output, flexible switching control, and instant input response—ideal for users managing mixed-interface systems in one workspace.
- One Keyboard & Mouse, Four Computers
Control up to four computers using one keyboard and mouse, simplifying complex setups and reducing desk clutter. - True 4K@60Hz Video Output
Supports resolutions up to 3840×2160@60Hz (4:4:4) for sharp visuals, smooth motion, and accurate image quality. - Multiple Switching Methods
Switch between computers via front panel button, IR remote, keyboard hotkeys, or mouse gestures to match different workflows. - Keyboard & Mouse Pass-Through
Pass-through mode ensures instant response after switching and improves compatibility with a wide range of keyboards and mice.
Technical Details
Notes
For the best compatiblity, it is better to turn on keyboard and mouse pass through mode. In this mode, the keyboard and mouse are dynamically mapped to computer, so you are able to use special keyboard and mouse that with multimedia keys or other customized keys.
Specifications
Input Ports:
- Laptop:USB-C supports DP Alt Mode DP 1.2 ,with support for USB 2.0 (up to 480 Mbps)
- Desktop:3*(HDMI+USB-B)HDMI port support HDMI 2.0a (up to 4K@60Hz);
Output Ports:
- HDMI port support HDMI 2.0a (up to 4K@60Hz);
Other Ports:
- Keyboard emulation: 1 * USB Type A
- Mouse emulation :1 * USB Type A
- USB 2.0 Hub ports:1 * USB Type A
- L/R Audio output:1 * AUX
Display Behavior / Limits:
- 3840x2160@60Hz
- 2560x1440@120Hz
- 1920x1080@240Hz
System Compatibility:
Unix/Windows/Debian /Ubuntu /Fedora /Mac OS X/ Raspbian /Ubuntu for Raspberry Pi and other Linux based systems
Switching / Control:
- Front panel buttons
- IR Remote Control
- Hotkey Switching
- Mouse Gesture
Power & Physical:
5V 2A
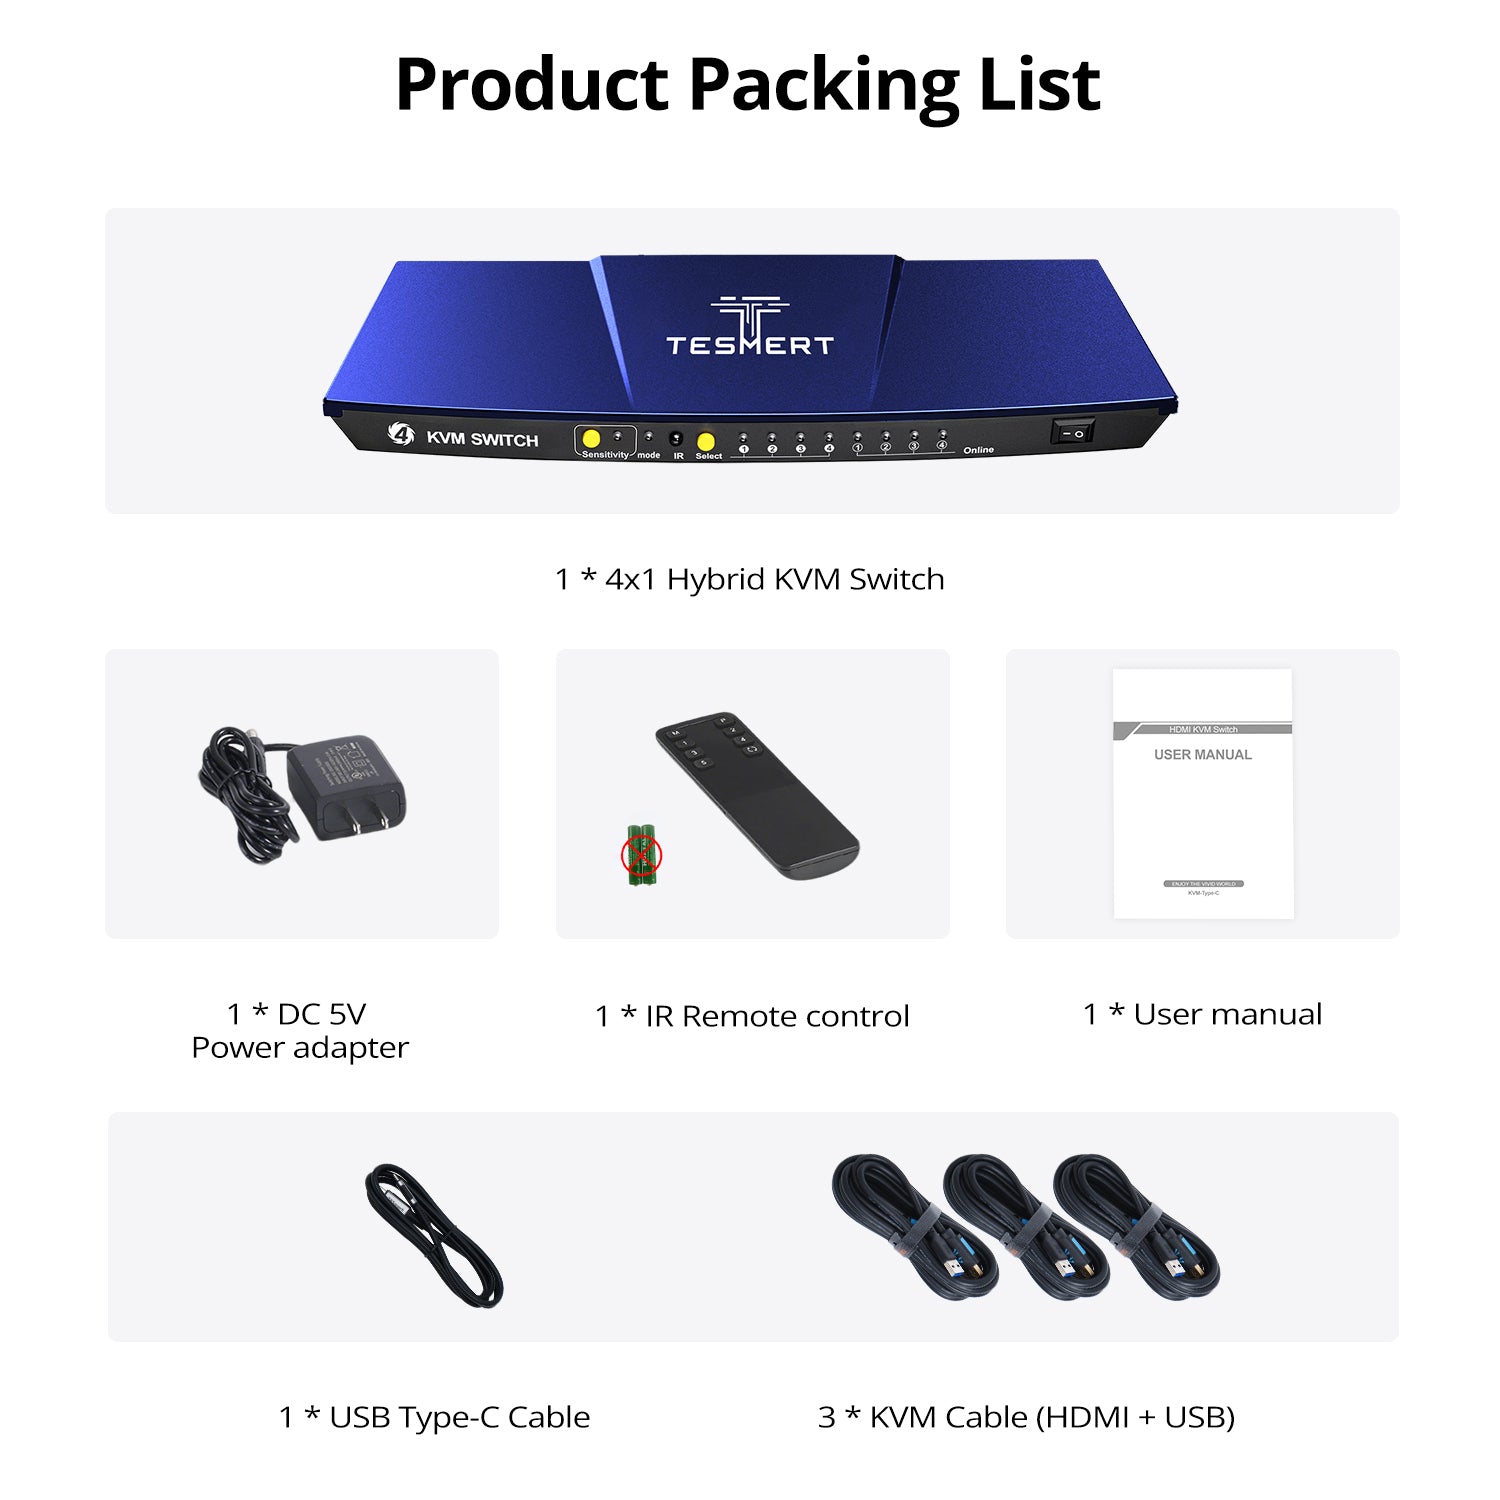
Included in the Box

1 * 4x1 Hybrid KVM Switch

IR Remote control

3 * KVM Cable (HDMI + USB)

1 * USB Type-C Cable

DC 5VPower adapter

User manual
Product comparison
TESmert
4×1 Hybrid KVM Switch T5410US
TESmert
4×1 HDMI KVM Switch T1410US
TESmert
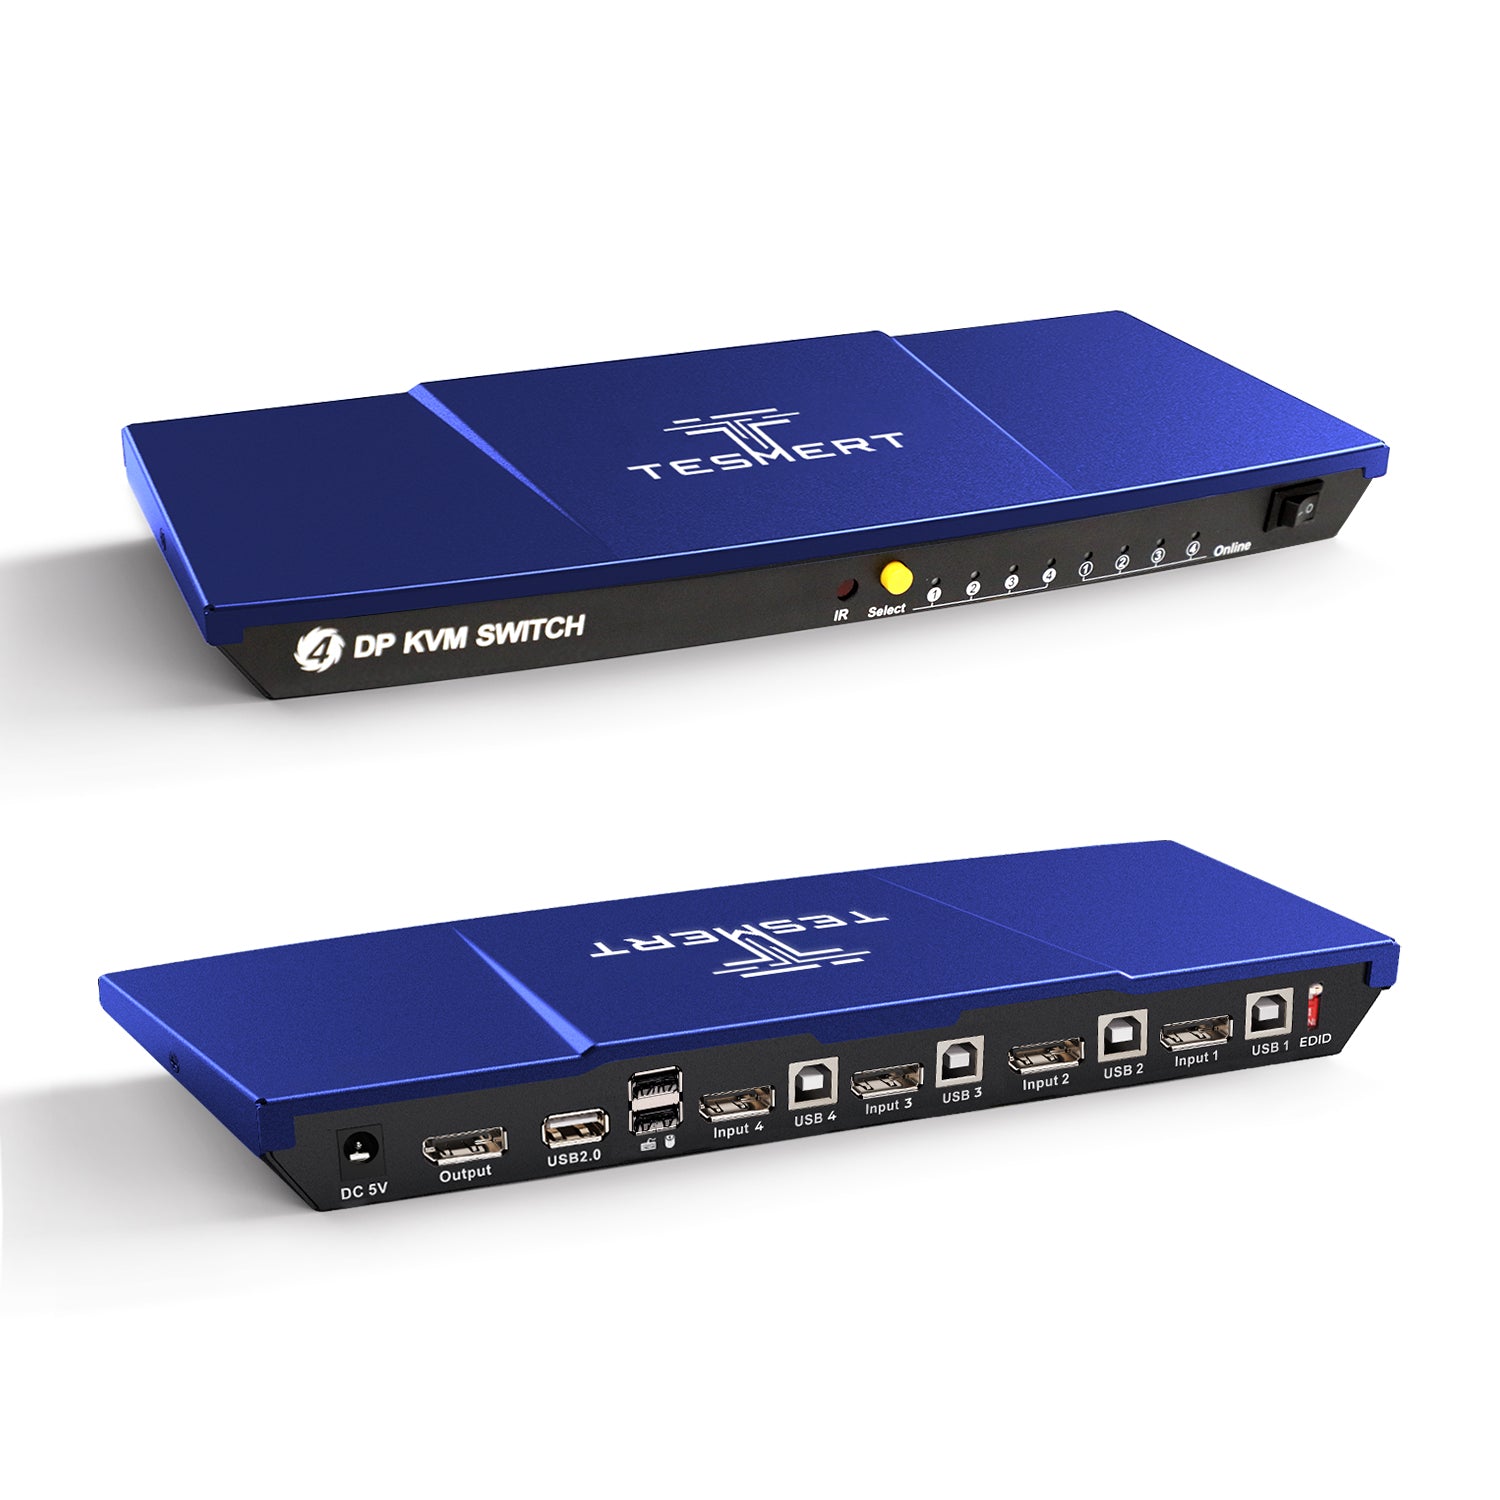
4×1 DP KVM Switch T2410US
TESmert
4×1 Hybrid KVM Switch T5410US
TESmert
4×1 HDMI KVM Switch T1410US
TESmert
4×1 DP KVM Switch T2410US
Amount of Computers
4
Amount of Computers
4
Amount of Computers
4
Amount of Monitors
1
Amount of Monitors
1
Amount of Monitors
1
Video Type
HDMI2.0 + USB-C
Video Type
HDMI 2.0
Video Type
DisplayPort 1.4
Max Resolution
4K60Hz
Max Resolution
4K60Hz
Max Resolution
5K120Hz/4K144Hz
EDID Emulation
YES
EDID Emulation
YES
EDID Emulation
YES
Special Features
USB-A 2.0 Sharing Port * 1
Hot Plug
Passthrough Mode
L/R Out
Special Features
USB-A 2.0 Sharing Port * 1
Hot Plug
Passthrough Mode
L/R Out
Special Features
USB-A 2.0 Sharing Port * 1
Hot Plug
Passthrough Mode
Does the KVM Switch support both Mac and Windows environments?
Yes. The T5410 supports Unix, Windows, and macOS, as well as Linux distributions including Debian, Ubuntu, Fedora, Raspbian, and Ubuntu for Raspberry Pi.
The KVM Switch performs video and USB switching based on standard HDMI / USB-C (DP Alt Mode) and USB protocols, independent of the operating system. This makes it suitable for cross-platform and multi-OS mixed-use environments.
What is the function of the EDID emulator?
Each input port on the KVM Switch includes a built-in EDID emulator to ensure that connected PCs always receive correct display information.
Functions:
- Keeps the connected computer continuously detecting a valid display.
- Prevents resolution changes during source switching.
- Maintains stable screen layout and application window positions.
What is Pass Through Mode?
Pass Through Mode improves compatibility with advanced keyboards and mice by allowing them to behave as if they were directly connected to the computer.
Benefits:
- Better support for gaming keyboards and mice.
- Improved handling of special keys and macros.
Notes:
- Bluetooth keyboards and mice are currently not supported.
- If the keyboard or mouse does not work when connected to the dedicated keyboard/mouse port, please try one of the following solutions:
① Disable Pass Through Mode: [Scroll Lock] → [Scroll Lock] → [F2]. A beep sound indicates that Pass Through Mode has been disabled.
Note: Restart the system for the change to take effect.
② Connect the keyboard or mouse to a USB 2.0 port instead of the dedicated keyboard/mouse port.
What do the indicator lights mean on the KVM Switch?
Online Indicator (Blue)
Indicates the USB connection status between the computer and the KVM Switch.
- ON (Blue):
The USB link is active. The computer is connected to the KVM Switch via a USB-C cable (Input 1) or USB A-to-B cable (USB 2-4), both devices are powered on, and USB communication is operating normally. - OFF:
The USB link is not established. There is no active USB communication, and all USB peripherals connected to the KVM Switch will be unavailable.
Select Indicator (Blue)
Indicates the currently selected input source.
- 1 (Blue): The KVM Switch is currently switched to Input 1.
- 2 (Blue): The KVM Switch is currently switched to Input 2.
- 3 (Blue): The KVM Switch is currently switched to Input 3.
- 4 (Blue): The KVM Switch is currently switched to Input 4.
- Note: The Select Indicator does not indicate HDMI / USB-C (DP Alt Mode) link status or signal quality. It simply shows the active input source. It reflects the selected input and is independent of the HDMI / USB-C (DP Alt Mode) signal connection.
Mode Indicator (Blue)
Indicates whether Pass Through Mode is enabled.
- ON (Blue): Pass Through Mode is enabled.
- OFF: Pass Through Mode is disabled.
- Note: After enabling or disabling Pass Through Mode, the KVM Switch must be restarted for the change to take effect. The Mode indicator light will update only after reboot.
Mouse Gesture Sensitivity Indicator
Indicates the sensitivity level of Mouse Gesture Mode. The device supports five adjustable sensitivity levels (Level 1–Level 5). Sensitivity increases from Level 1 (lowest) to Level 5 (highest).
The number of flashes (1–5) corresponds to Sensitivity Levels 1–5.
The indicator flashes only during sensitivity adjustment and does not remain illuminated during normal operation.
How to set the Auto Scan interval?
Confirm Auto Scan is Enabled (Disabled by default)
Use the hotkey [Scroll Lock] → [Scroll Lock] → [Space] to enable the Auto Scan function.
Note: The Auto Scan interval cannot be set if the Auto Scan function is disabled.
Adjust the Scan Interval
- Interval range: 5–250 seconds (default: 6 seconds)
- Use [Scroll Lock] → [Scroll Lock] → [+] / [-] to increase or decrease the interval by 1 second per press
- To quickly set a longer interval, press [Scroll Lock] twice, then tap [+] / [-] repeatedly — do not hold the keys down
Tips
- Adjust the scan interval according to your usage scenario to ensure smooth switching between connected devices. Auto Scan is primarily designed for monitoring or display applications with multiple active input devices
- Auto Scan operates using a port polling mechanism. Once enabled, the device automatically cycles between the four input ports (PC1 → PC4) at fixed time intervals, switching only among ports with an active and valid input signal
Does the USB-C port support charging a laptop?
No. The USB-C port on Input 1 supports video (via DP Alt Mode) and USB data transmission only. It does not support USB Power Delivery (PD) and therefore cannot charge a connected laptop.
Can I change the keyboard hotkey trigger key?
Yes. The default trigger key is [Scroll Lock], but you can switch it to [Right Ctrl] using either of the following methods:
1) Using keyboard hotkeys:
- To switch from [Scroll Lock] to [Right Ctrl]: press [Scroll Lock] → [Scroll Lock] → [F1]. The KVM Switch will emit one beep.
- To switch back from [Right Ctrl] to [Scroll Lock]: press [Right Ctrl] → [Right Ctrl] → [F1]. The KVM Switch will emit two beeps.
2) Using the front panel button:
Press and hold the [Select] button on the front panel until you hear the buzzer beep. This will toggle the hotkey trigger key.
Note: After changing the trigger key, all keyboard hotkey commands will use the newly selected trigger key.
Why can't Mouse Gesture Mode be enabled or used?
Mouse Gesture Mode can only be enabled and function properly when Pass Through Mode is disabled. If Pass Through Mode is enabled, Mouse Gesture Mode will not work, even if it has been turned on.
Notes :
- Enable / Disable Mouse Gesture Mode: [Scroll Lock] → [Scroll Lock] → [F12]
- Enable / Disable Pass Through Mode: [Scroll Lock] → [Scroll Lock] → [F2]
- Two beeps: feature enabled; One beep: feature disabled
Recommendation:
Ensure Pass Through Mode is turned off before enabling Mouse Gesture Mode.
Why is the mouse limited to the primary monitor and cannot move to the secondary monitor?
Cause:
When Mouse Gesture Mode (fast switching mode) is enabled, the KVM Switch reports the mouse as an absolute positioning device rather than a standard relative positioning mouse. In absolute positioning mode, the operating system maps the mouse coordinates only to the primary monitor, so the cursor cannot move to the secondary display.
This design enables the KVM Switch to detect cursor movements at the screen edges for quickly switching between inputs.
Solution:
Disable Mouse Gesture Mode to restore normal mouse operation across all monitors. You can do this using the hotkey: [Scroll Lock] → [Scroll Lock] → [F12].